On this page:
How to start the approval process?
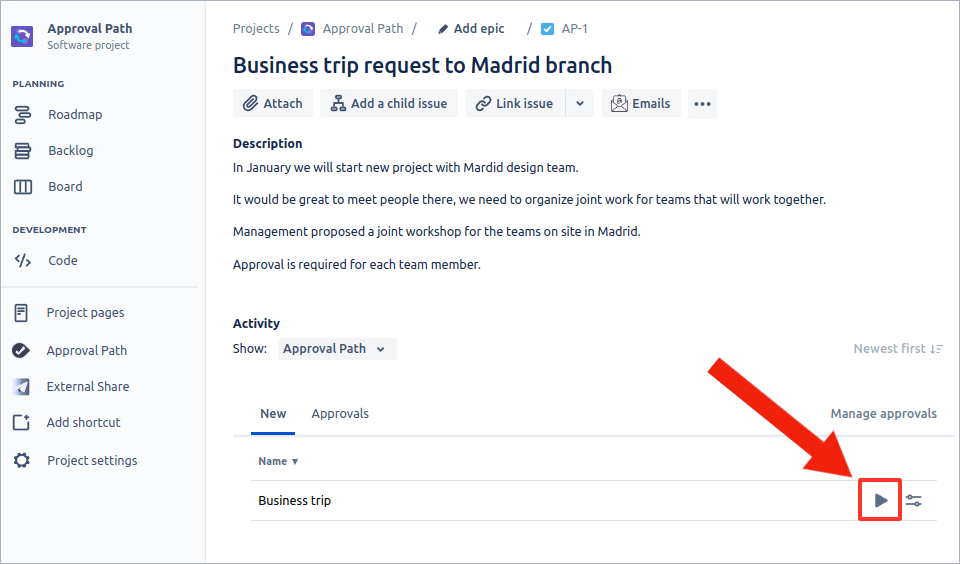
Open any Jira issue page and open Activity tab “Approval Path”.

If there is no approval definition created in the Jira project, first you will have to create an approval definition.
If there is at least one approval definition you can start it.
To start the approval path click start button:
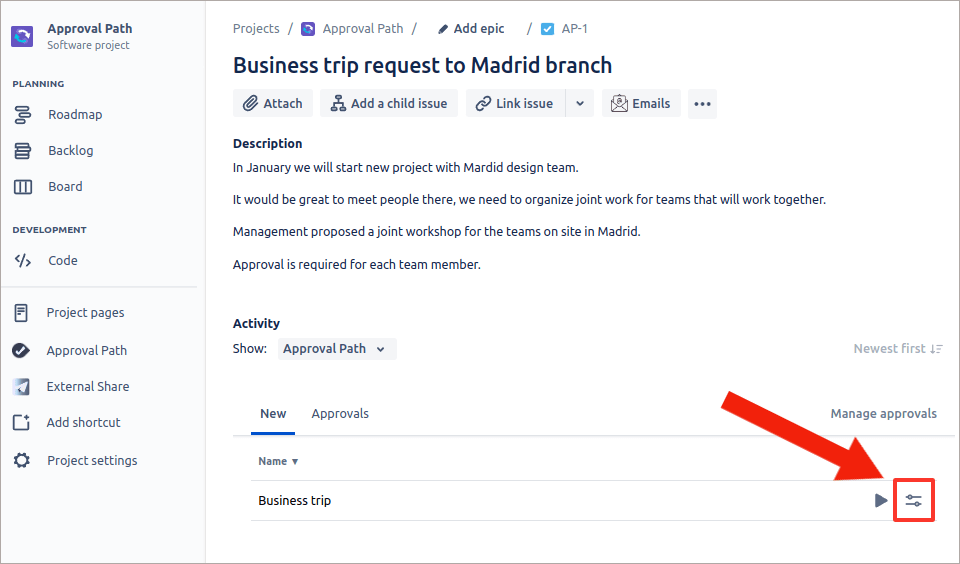
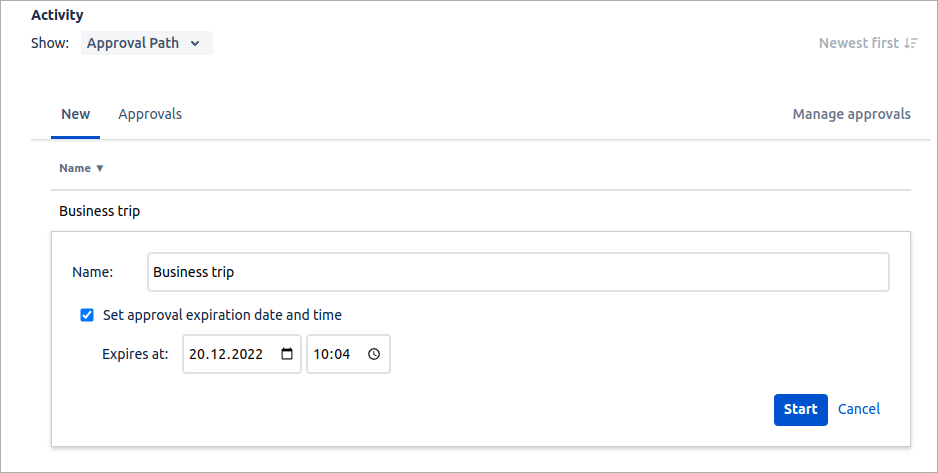
You can also parametrize approval path and set your own name and expiration date and time.
If it is your turn to decide, the “approve” and “reject” buttons will appear.
If the action type in the step is consent there will be “consent” and “reject” buttons.
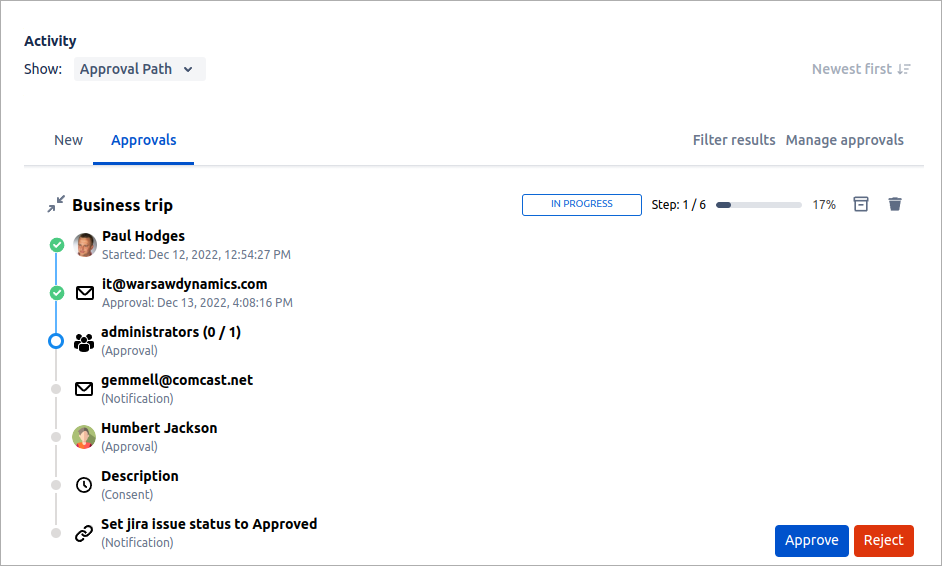
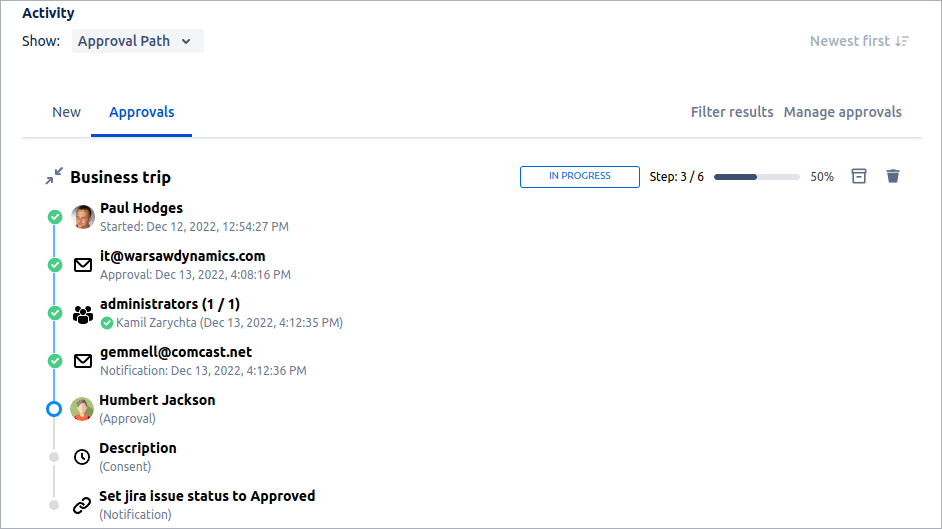
When your step is approved, the path will move forward to the next step. You can see the current step at any time.
Finished approval path
Completed
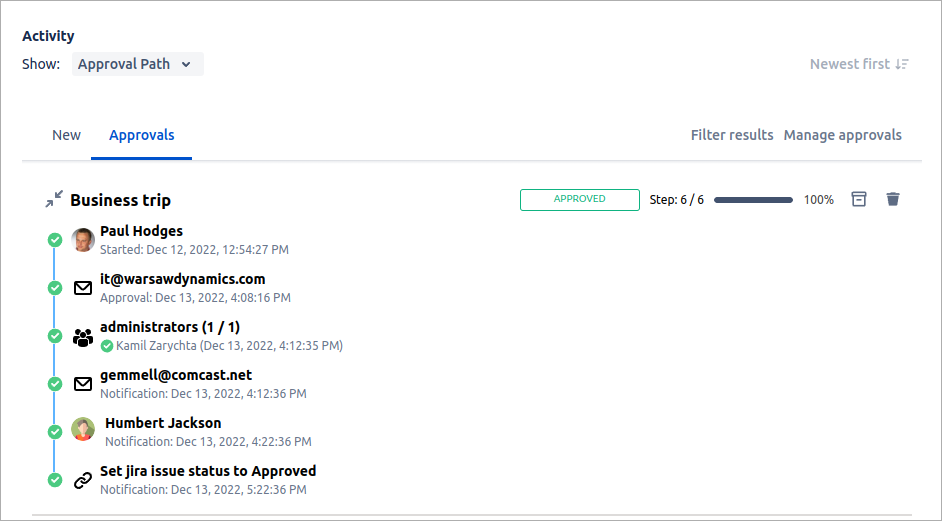
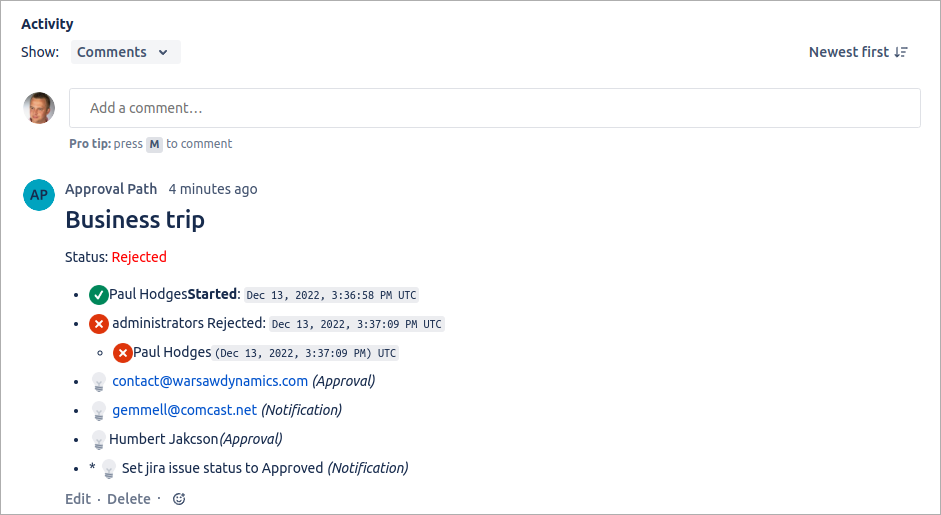
If all the steps are approved, the path will be finished with a Completed successfully status. The automatically generated report will appear in the comment.
Rejected
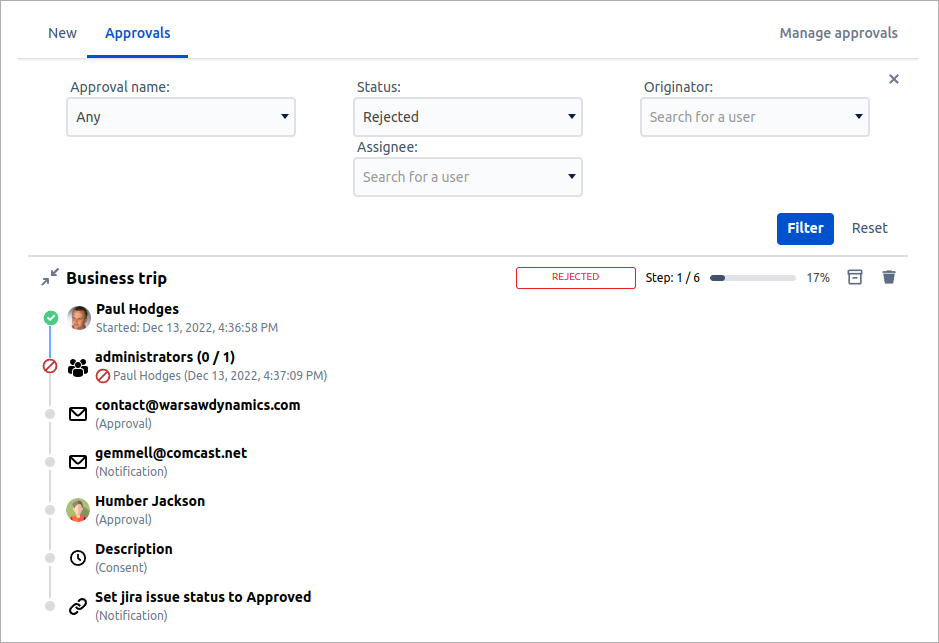
If the step is rejected, the path will be finished with a Rejected status. The automatically generated report will appear in the comment.
Archive
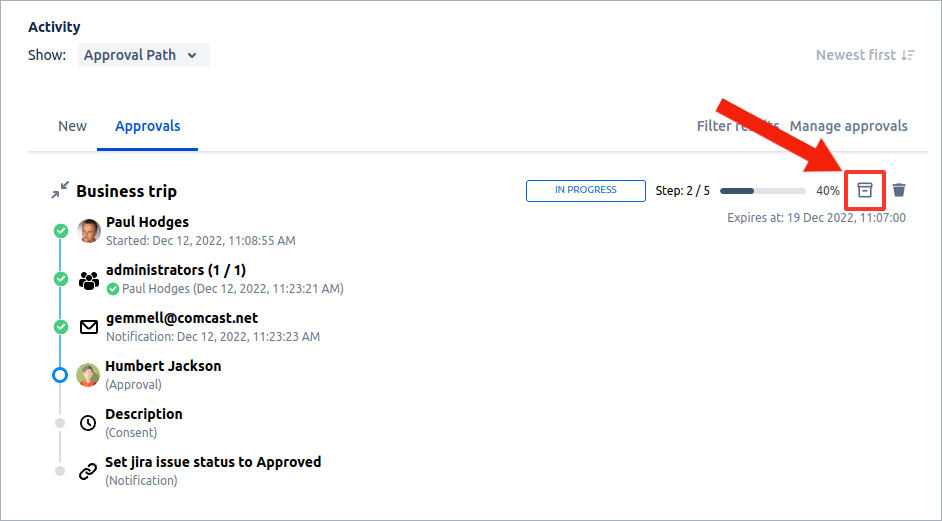
The approval path can be archived at any time. You can use Filter results to search for archived approvals.
Delete
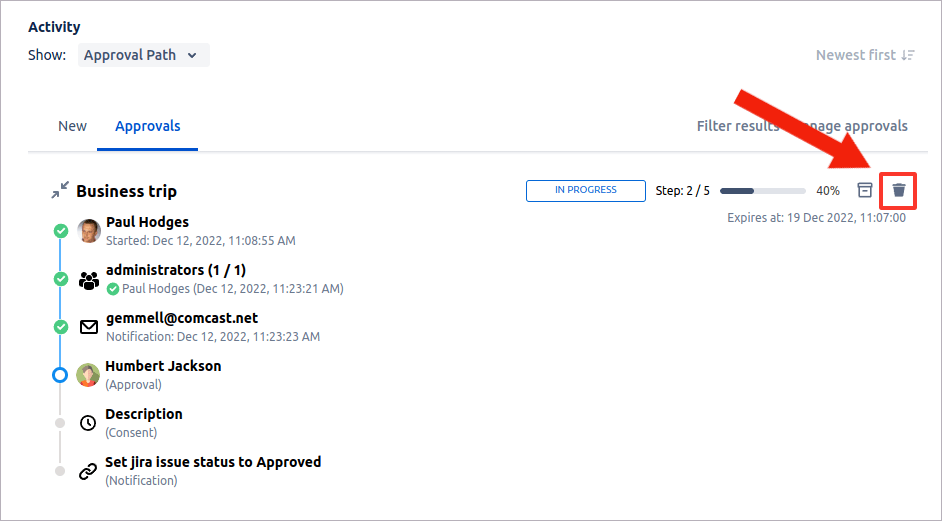
The approval path can be deleted at any time. The automatically generated report will appear in the comment.